Swimming can be one of the most important and useful skills your child can develop. Of the many benefits, none are more crucial than improved safety around water. Research shows that for young children, participating in swimming lessons is associated with a 88% reduction in drowning risk.
Beyond being safe in and around water, swimming is an activity that can be enjoyed for a lifetime, whether it’s recreationally, for health and fitness, or competitively. Plus, it’s just plain fun – especially for kids!
Are parents qualified to teach a child how to swim?
While private or group swim lessons are available with trained instructors, these aren’t the only options – or necessarily the best one for your child. There are many reasons why a parent may choose to do it themselves, including financial limitations, availability of classes, social challenges, or even personal preference. The bottom line – as long as your child learns to swim properly, it’s not important how it happened.

If you’re nervous about teaching your child how to swim, don’t worry – that feeling is completely normal. By familiarizing yourself with basic swim instruction principles, you can be more than qualified to teach your own child how to swim. Plus, you also have the benefit of knowing your child better than any coach could. Understanding his or her personality, fears, motivations, and behaviors can be invaluable as you go through the learning process.
This guide will give you the knowledge and tools to teach your child how to swim. We’ll cover some information on preparing for lessons and then highlight the nine foundational swim skills.
- Water Comfort
- Fear Cessation
- Doggy Paddle
- Breath Control
- Back Floating
- Front Kicking
- Treading Water
- Survival Swim Skills
- Basic Swim Test Skills
What you’ll need.
You don’t need too much equipment to start swim lessons with your child. This biggest requirement is a pool (either indoors or outdoors) that offers easy entry and a reasonable amount of privacy (without other kids splashing around, making waves). For children, the ideal water temperature is between 84 and 90 degrees. If the water is colder, you may need to shorten the duration of each lesson.
Other items you’ll need include:
- Progressive training vest with 9 flotation inserts (we recommend the SwimWays Power Swimr)
- Noodle float
- Swim toys
- For children 2–3.5 years old, we recommend double-layering swim diapers
Taking a progressive approach.
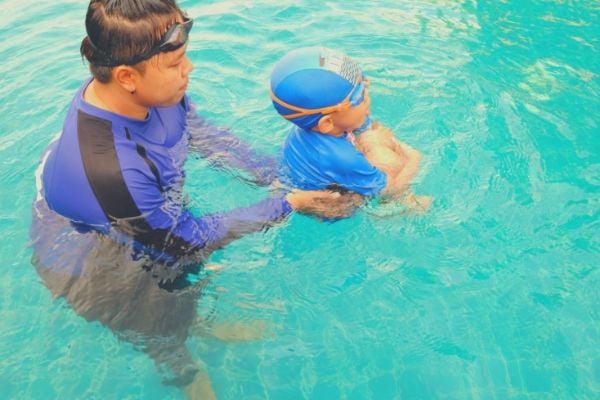
We’ve all heard stories of adults throwing children into the deep end of the pool and forcing them to learn how to swim (or sink). This program is the opposite of the “survival method” that can be dangerous and counterproductive. Instead, you’ll be taking a gentle, progressive approach that fosters trust and confidence each step of the way.
A big part of this process is using a progressive training vest that starts your beginner swimmer off with the comforting support of floatation. When your child starts the program, he or she will be supported by 9-floatation inserts. These will keep your child above water so he or she can focus on developing strength and coordination without the fear of sinking. As you progress through the skills detailed below, you can gradually remove the inserts and provide less hands-on assistance until your child develops into a consistent, independent swimmer.
- Parent-assisted with vest
- Parent unassisted with vest
- Solo swimmer no vest
The goal of this program is to build basic swimming skills, not necessarily specific strokes. By following this guide, your child will learn enough to be confident in the water, play with friends, and pass a basic swimming test, which typically requires:
- Swimming 25 yards without a floatation, breathing appropriately as needed
- Swimming for two minutes without tiring
- Propelling themselves using strong kicks and arm pulls
- Being comfortable with back floating and roll-over swimming
- Spotting and swimming to the closest wall
Tips for conducting swim lessons.
As a parent and swim coach, one of the most important things you can impart on your child is a positive attitude. Your child is a sponge and will respond to your emotions and loving support.
Here are some general tips for making your lessons as positive and productive as possible:
- Start each session relaxed and comfortable.
- Keep lessons to about 20-30 minutes in the water.
- Use excitement, rewards, and praise.
- Take baby steps and don’t rush progress.
- Avoid pushing your child past his or her comfort zone (or yours, for that matter).
- Understand that progress may not be smooth.
- Look out for blue lips or constant shivering and take a break to warm up when your child needs.
- If you or the child are having a hard day, it’s OK to skip the swim lesson. It’s better to wait than have a negative, frustrating session.
- Above all – have fun! Your child will be more receptive to instruction if they are enjoying the experience of swimming.
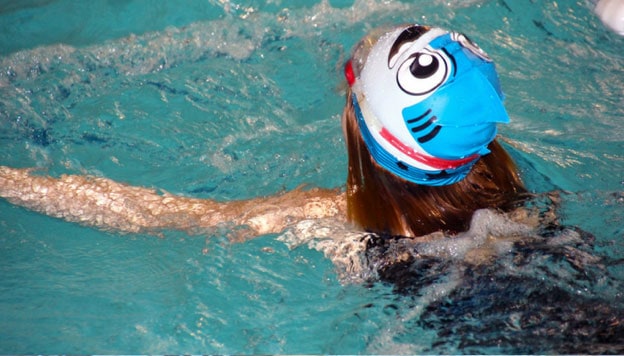
Skill 1: Water Comfort

Why it’s important.
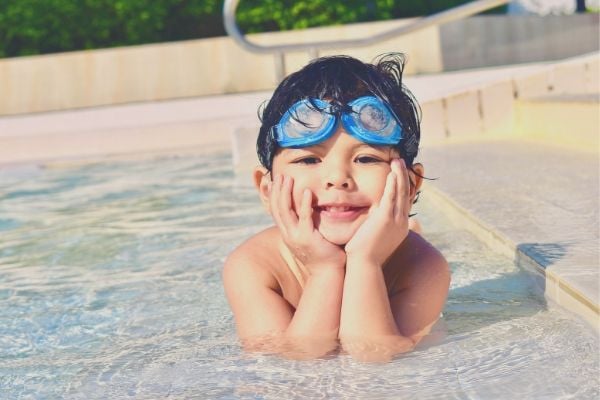
If your child is not comfortable around water, then even the best swim instruction in the world won’t make a difference. When your little one is excited to spend time with you in the pool, the lessons will be more effective and the experience more positive. Every child develops this comfort at a different rate. Your job is to support them in getting there.
Measuring progress.
As your child becomes more comfortable with the water, you’ll notice an increased willingness to enter the pool or try new activities. Hopefully, your child will talk positively about swimming and your sessions. When he or she is excited about swimming, you are ready to work on the next skills.
Check out our full lesson on helping your child become more comfortable in the water.
Skill 2: Fear Cessation

Why it’s important.
For a first-time swimmer, fear of water and drowning is a common (and natural) challenge. This fear can prevent the child from entering the water or be resistant to practicing skills. Building confidence is a process – there’s no magic pill that makes someone’s fear vanish in one session. Be patient, offer encouragement, and your child will eventually come around.
While fear cessation is essential for learning how to swim, it’s also important to teach your child to respect the water. There is always some risk, even for experienced swimmers. The goal is for your child to be a safer swimmer.
How to start.
First, you have to find your child’s current comfort level and use that as a starting point. For some children, that may be walking right into the water while others may need to sit by the side of the pool with only feet in the water.
Once you’re both in the pool, give your child a big hug and gently move through the water together. Make the experience fun by telling a story, making into a game, or singing. If your child gets upset, don’t force the exercise. Try to stay in the water together for one or two minutes, then take a break.
Measuring progress.
It will be clear when your child’s fear begins to subside. Be prepared for setbacks such as if your child swallows water or has another unpleasant experience. When this happens, it’s important that you as the coach remain positive and offer encouragement to rebuild the child’s confidence.
Check out our full lesson on helping to reduce your child's fear of the water.
Skill 3: Doggy Paddle

Why it’s important.
While it sometimes gets a bad rap, the doggy paddle is a good foundational swimming stroke that allows children to gain confidence in the water and build coordination for other strokes. It’s the simplest technique to pick up and is often the one used by children to play in the pool with friends and family.
How to start.
Here’s a good exercise that allows your child to build the movement patterns and coordination for the reach, scoop, and pull of the doggy paddle.
- Start your child on the pool steps with water at about chest height
- You can either sit next to your child or face him or her
- Staying seated, slowly start reaching out and scooping the water back toward you - alternating 1 arm at a time
- The goal is to have your child mirror your actions - we like to make it into an engaging make-belief game, where we pretend our hands are spoons and the pool is a bowl of your child’s favorite ice cream
- You want to reach out with your spooned hand and grab a scoop of ice cream and pull it all the way down to your pocket, where we’ll keep it to snack on later
- When we scoop, we like to say “chocolate” for 1 scoop and “vanilla” for our other scoop
Measuring progress.
When your child masters the doggy paddle, the technique should look like this:
- One arm at a time should reach out until it's fully extending in front of the shoulder.
- From there the hand should scoop the water and pull backward toward the feet until the hand reaches the "pocket" area at the hip.
- Fingers should be closed and the hand should be fully open.
Check out our full lesson on teaching your child how to doggy paddle.
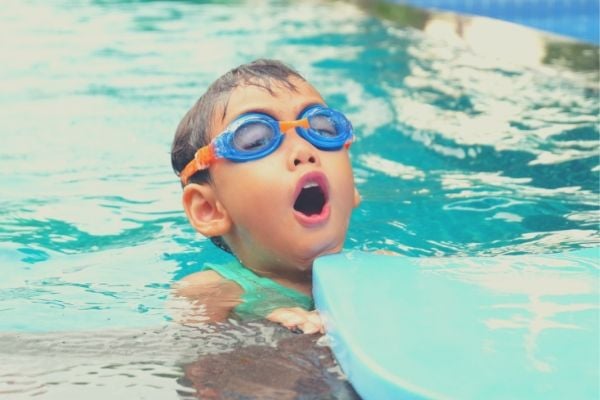
Skill 4: Breath Control
Why it’s important.
The ability to breath relaxed and controlled is essential for swimming longer distances. Breath control also indicates a reasonable level of comfort in the water. For your child, basic breath control begins with a willingness to submerge the face and hold his or her breath for a short moment.
How to start.
One game that is typically successful at encouraging a child to place his or her face in the water is “Catch the Fish.” Here’s how you play.
- Start at the stairs with your child seated and faced toward you.
- Choose to be a dolphin or an alligator or any other aquatic animal, then ask your child: “Will you be a dolphin with me?”
“What color dolphin do you want to be?”
“What color dolphin should I be?”
“What do dolphins eat for lunch?”
"Let's catch some fish!" - Look down and say, “Uh oh, all the fishes are at the bottom of the pool, how can we get them up to the top?”
- Say, “I know! How about we give the water a big dolphin smooch?” Take the lead with confidence that your child will mirror your behavior and give the water a kiss. The goal here is that your child will be brave enough to also kiss the water and get his or her lips wet.
- Say, “Oh no! They came up for a second and went back down, let’s try something else.”
- Say, “Can you touch the water with the tippy, tippy, tip of your nose?” and demonstrate.
- Once your child gives in and tries the activity - keep playing along! Say, “Yes! They’re all at the top again – I’m going to gobble up a fish, watch me!”
Measuring progress.
Eventually, your child will be comfortable submerging his or her face. It may take one lesson or several for this to happen. Once he or she has done it, you can work up to longer durations.
Check out our full lesson on teaching your child breath control in the water.
Skill 5: Back Floating

Why it’s important.
The back float is an important skill of safer swimming because it can be used to take a rest from swimming and breath. Some children are comfortable back floating right away while others may be more fearful.
How to start.
A good way to introduce back floating to your child is with this check-to-cheek hold.
- Start at the stairs with your child faced away from you at chest-height water.
- Give your child a hug from the back with your chest on his or her back.
- Line up your dominant arm's shoulder with your child's head. He or she will use your shoulder as a "pillow" during this exercise.
- Place your dominant arm between your child's body and arm, and gently rest it on his or her cheek. Gently snuggle his or her face between your hand and your cheek.
- Take your other hand and place it around your child's waist
- With your hands around their waist, slowly start sinking into the water together using your chest as a supportive brace for your child's back
- At the point that your child's torso is floating, you can take your non-dominant arm and move it to his or her back for additional upward support. Your dominant hand can move over your child's chest and hold his or her hand for the added comfort. Give your child reassurance that they are safe!
How to measure progress.
It may take several lessons for a child with fear of the back float to loosen up and start feeling more comfortable with the exercise. Here is the form you’re looking to accomplish for a proper back float:
- Arms and legs are relaxed and loose (tense legs and arms can indicate fear).
- Arms and legs are out in an X formation.
- Head is resting gently back in the water with water at ear level.
Check out our full lesson on how to teach your child to back float.
Skill 6: Front Kicking
Why it’s important.
Front kicking is usually the main way that young swimmers propel themselves forward in the water. A strong and properly performed front kick is one of the best safer swimming skills that your child can learn.
How to start.
The initial goal is to get your child comfortable in a horizontal position and start developing muscle memory and coordination in his or her legs. Here’s how to do the cheek-to-cheek hold for front kicking.
- From hugging position, sink down to chest-height water.
- Ensure your child’s chin is resting gently on your shoulder in cheek-to-cheek position.
- Walk your hands underneath your child's body, using the length of your arms to support their torso and waist and grab his or her legs with your fingers wrapped around the front of the knee and your thumbs running down the back of the knee.
- Ask if it’s okay if you move your child’s legs for them.
- Gently guide your child's feet to the water’s surface. Demonstrate an up and down motion (6 inches up and down) of kick with light and loose knee bend. Notice how the toes come out of the water only slightly
- Do this exercise together for 10 to 20 kicks, then have your child try and copy how it felt on his or her own. You can keep your hands under his or her knees, but do not help with the kicking.
Measuring progress.
While practicing the front kick, feel for tension in your child’s leg muscles or watch for flexed ankles that make an L shape. These indicate some level of fear. As your child becomes more comfortable, you should notice:
- Kicks made with straight legs with loose knees and ankles.
- Muscles in their legs are relaxed and loose.
- Feet staying at the surface of the water making small, fast splashes.
Check out our full lesson on how to teach your child to front kick in the water.
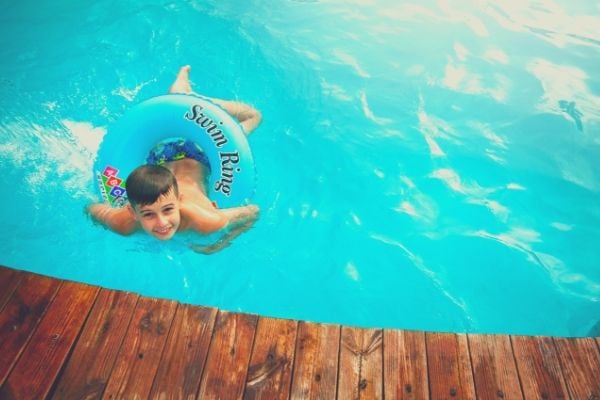
Skill 7: Treading Water
Why it’s important.
Learning how to tread water effectively (keeping the head above water) and efficiently (using a little energy as possible) can be a life-saving skill. It’s also a technique your child will likely use frequently if playing in a pool with other kids.
How to start.
Introduce the following techniques in this order. Model the actions and make the practice playful. Your child can wear the flotation vest until he or she (and you) feel comfortable removing inserts.
- Arm movements – sculling
- Start in the shallow end of the pool.
- Have your child cup their hands and place them under the water at their sides.
- Instruct your child to stiffen their wrists and sweep their hands back and forth under the water. Watch to make sure that their fingers remain cupped, not separated.
- Have your child move their hands close together, towards their bellies. Instead of clapping together, their hands should turn and go the other way.
- Leg movements – bicycle kick
- Move to a deeper part of the pool where your child can’t stand.
- Have your child move their legs in a motion similar to pedaling a bicycle.
- Focus on helping your child push down by bending their knees.
- Putting it all together
- The key to treading water is sculling with the hands while bicycle kicking with the legs.
- This combined motion takes coordination and practice.
How to measure progress.
Gradually remove the floats until your child is treading water vest-free. Then increase the duration of treading water unassisted. If you child can tread water for one or two minutes, that is an excellent start!
Check out our full lesson on how to teach your child to tread water.
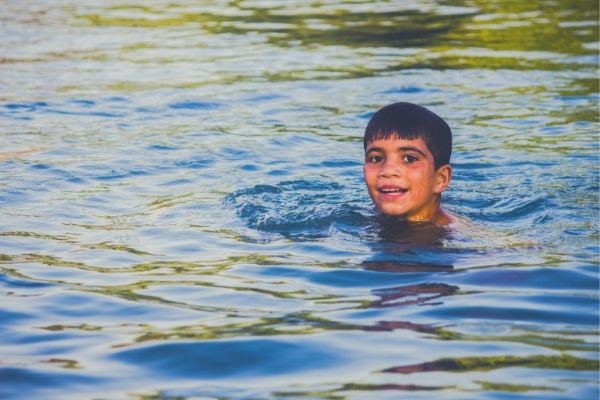
Skill 8: Survival Swim Skills
Why they’re important.
As we mentioned before, swimming is never a 100% safe activity – even for accomplished athletes. While children should always be supervised in the water, it’s also important that they have the skills to avoid or escape a dangerous situation.
How to start.
Survival swimming incorporates many of the skills we already covered, including breath control, doggy paddle, front kick, and treading water. Keep working on these skills and talk with your child about the importance of water safety. That includes knowing how to properly get in and out of the pool, taking breaks when they get tired, and what to do if their goggles come off or fill with water.
Measuring progress.
Hopefully your child will never need to put these survival swim skills into action. Once he or she is swimming solo in the water, watch closely, give praise for good decisions in the water, and make supportive corrections to any dangerous behaviors.
Check out our full lesson on teaching your child survival swimming skills.
Skill 9: Basic Swim Test Skills
Why they’re important.
There are many situations where your child will need to pass a basic swimming test, whether it’s for a swim team, gym class, or summer camp.
How to start.
This guide covers the basic skills required for new swimmers. By following a progressive approach, your child will have the fundamentals and confidence needed to pass most basic swim tests.
How to measure progress.
As your child improves, he or she will can remove the floats from the vest and require less hands-on support. Once that is achieved, you can work toward reaching milestones of each skill. Feel free to download and use this Progress Chart. The ultimate measure of success is for your child to pass his or her swim test.
Check out our full lesson on how to teach your child the proper skills to pass a basic swimming test.
What’s next.
Teaching your child how to swim can be a fun, rewarding experience. However, if you prefer enrolling your child in formal swimming lessons with a trained staff, that’s great, too!
Learn about our FUNdamentals swim classes at our Atlanta, GA location.
